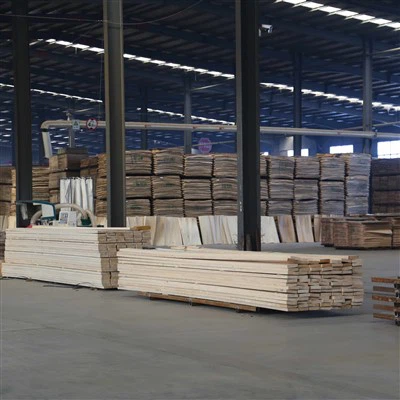
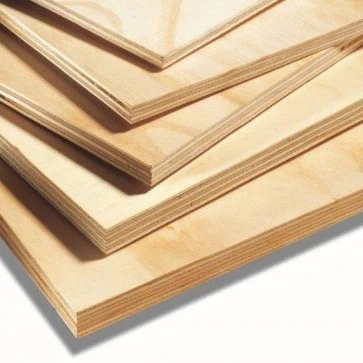
Indoor structural plywood is a versatile and reliable building material that offers excellent strength and durability for floor installations. As a trusted indoor structural plywood supplier, I'm here to guide you through the process of installing it on your floors. In this blog post, I'll share step-by-step instructions, tips, and important considerations to ensure a successful installation.
Step 1: Prepare the Subfloor
Before you begin installing indoor structural plywood on your floors, it's crucial to prepare the subfloor properly. The subfloor should be clean, dry, and level. Remove any debris, dirt, or old flooring materials from the surface. Check for any uneven areas or damage and repair them as needed. A smooth and level subfloor will provide a stable base for the plywood and help prevent future issues such as squeaking or uneven wear.
Step 2: Measure and Cut the Plywood
Once the subfloor is prepared, measure the dimensions of the room to determine the amount of plywood you'll need. It's a good idea to add a little extra to account for any cutting errors or waste. Use a tape measure and a straightedge to mark the plywood for cutting. You can use a circular saw or a table saw to cut the plywood to the desired size. Make sure to wear appropriate safety gear, such as goggles and ear protection, when using power tools.
Step 3: Lay the Plywood
Start by laying the first sheet of plywood in one corner of the room. Make sure the edges of the plywood are flush with the walls and the subfloor. Use a level to check that the plywood is flat and level. If necessary, shim the plywood to ensure a level surface. Once the first sheet is in place, continue laying the remaining sheets of plywood, staggering the joints to create a stronger and more stable floor. Leave a small gap of about 1/8 inch between the sheets of plywood to allow for expansion and contraction.
Step 4: Secure the Plywood
Once all the sheets of plywood are laid, it's time to secure them to the subfloor. You can use nails or screws to fasten the plywood. If you're using nails, use a nail gun to drive the nails into the subfloor at regular intervals. Make sure the nails are long enough to penetrate the subfloor and the plywood. If you're using screws, use a drill to pre-drill holes in the plywood and then drive the screws into the subfloor. Make sure the screws are tightened securely to prevent the plywood from moving or squeaking.
Step 5: Finish the Edges
After the plywood is secured to the subfloor, it's time to finish the edges. You can use a router or a hand plane to smooth the edges of the plywood. This will give the floor a professional and finished look. You can also use a trim piece or a molding to cover the edges of the plywood and create a seamless transition between the floor and the walls.
Step 6: Sand the Floor
Once the edges of the plywood are finished, it's time to sand the floor. Sanding the floor will help to smooth out any rough spots or imperfections and prepare the surface for staining or painting. You can use a floor sander or a hand sander to sand the floor. Start with a coarse grit sandpaper and gradually work your way up to a finer grit sandpaper. Make sure to sand the floor in the direction of the wood grain to avoid scratching the surface.
Step 7: Stain or Paint the Floor
After the floor is sanded, it's time to stain or paint the floor. Staining or painting the floor will not only enhance the appearance of the floor but also protect it from wear and tear. You can choose from a variety of stains and paints to match the style and decor of your room. Make sure to follow the manufacturer's instructions when applying the stain or paint. Apply the stain or paint in thin, even coats and allow each coat to dry completely before applying the next coat.
Tips and Considerations
- Choose the Right Plywood: When choosing indoor structural plywood for your floors, make sure to choose a high-quality plywood that is suitable for your specific application. Look for plywood that has a high load-bearing capacity and is resistant to moisture and decay. You can find a variety of high-quality indoor structural plywood options on our website, including High Load-bearing Capacity Structural Plywood and Good Quaility Structural Plywood Roof Panels.
- Use the Right Tools: Using the right tools is essential for a successful installation. Make sure to use a sharp saw blade, a level, a nail gun or a drill, and other necessary tools. Using the right tools will make the installation process easier and more efficient.
- Follow the Manufacturer's Instructions: When installing indoor structural plywood on your floors, make sure to follow the manufacturer's instructions carefully. The manufacturer's instructions will provide you with important information about the installation process, including the recommended fasteners, the spacing of the fasteners, and the maximum span of the plywood.
- Consider the Environment: When installing indoor structural plywood on your floors, consider the environment in which the floor will be installed. If the floor will be exposed to moisture or high humidity, make sure to choose a plywood that is resistant to moisture and decay. You can find a variety of eco-friendly indoor structural plywood options on our website, including Eco Frendliy Structural Plywood In.
Conclusion
Installing indoor structural plywood on your floors is a great way to create a strong, durable, and beautiful floor. By following the steps outlined in this blog post and using the tips and considerations provided, you can ensure a successful installation. If you have any questions or need further assistance, please don't hesitate to contact us. We're here to help you with all your indoor structural plywood needs. Whether you're a professional contractor or a DIY enthusiast, we have the products and expertise to help you get the job done right. Contact us today to learn more about our indoor structural plywood products and to discuss your project requirements. We look forward to working with you!


References
- Plywood Manufacturers Association. (Year). Installation Guide for Indoor Structural Plywood.
- Building Codes and Standards. (Year). Requirements for Floor Installations Using Structural Plywood.