How do you install water - resistant structural plywood roof panels on a curved roof?
Installing water - resistant structural plywood roof panels on a curved roof can be a challenging yet rewarding task. As a supplier of high - quality water - resistant structural plywood roof panels, I am here to guide you through the entire process.
Understanding the Basics of Water - Resistant Structural Plywood
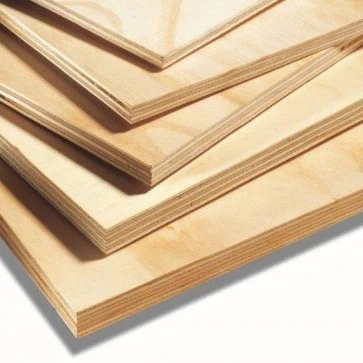
Water - resistant structural plywood is a specially engineered material designed to withstand moisture, which is crucial for roof applications. Our company offers a range of such products, including High Load - bearing Capacity Structural Plywood and Stable Indoor Structural Plywood. These plywood panels are made by bonding multiple layers of wood veneers with water - resistant adhesives under high pressure and temperature. This construction not only provides strength but also enhances the panels' ability to resist water penetration, rot, and decay.
The Original Factory Structural Plywood Size we offer allows for flexibility in design and installation. The standard thicknesses can range from 6mm to 25mm, and the panels usually come in large sizes, which reduces the number of joints on the roof, minimizing potential leakage points.
Preparing for the Installation
- Site Inspection: Before starting the installation, a thorough inspection of the curved roof structure is essential. Check for any signs of damage, such as cracks or weakened areas in the underlying framework. Ensure that the framework is properly aligned and can support the weight of the plywood panels.
- Material Selection: Based on the curvature of the roof and the expected load, select the appropriate thickness and grade of water - resistant structural plywood. Thicker panels are generally more suitable for roofs with a larger curvature or higher load requirements.
- Tools and Equipment: Gather all the necessary tools and equipment, including a circular saw, drill, nails or screws, a measuring tape, a level, and safety gear such as gloves and goggles.
Measuring and Cutting the Plywood
- Taking Accurate Measurements: Measure the curved roof carefully to determine the exact dimensions of the plywood panels needed. Use a flexible measuring tape to follow the curve of the roof. It's advisable to take multiple measurements at different points to ensure accuracy.
- Cutting the Panels: Mark the cutting lines on the plywood panels according to the measurements. Use a circular saw with a sharp blade to cut the panels. When cutting curved shapes, it may be necessary to make multiple small cuts to follow the curve precisely. Take your time to ensure clean and accurate cuts.
Installing the Plywood Panels
- Positioning the First Panel: Start by positioning the first plywood panel at one end of the curved roof. Align it with the edge of the roof and the underlying framework. Use a level to ensure that the panel is straight horizontally. Secure the panel temporarily with a few nails or screws at the edges.
- Bending the Panel: For a curved roof, the plywood panel needs to be bent to match the curve. This can be done gradually by applying gentle pressure along the length of the panel. You may need to enlist the help of a few people to ensure even bending. Once the panel is bent to the desired curve, secure it firmly to the framework using nails or screws. The fasteners should be driven in at regular intervals, typically around 150 - 200mm apart.
- Installing Subsequent Panels: Continue installing the remaining panels one by one, overlapping the joints by a few inches to create a watertight seal. Make sure that the panels are properly aligned and the joints are tight. As you progress, check the alignment and level of the installed panels regularly to maintain a smooth and even roof surface.
Sealing the Joints
- Applying Sealant: After all the plywood panels are installed, it's crucial to seal the joints to prevent water leakage. Use a high - quality waterproof sealant specifically designed for roof applications. Apply the sealant evenly along the joints, filling any gaps or voids.
- Inspecting the Sealed Joints: Once the sealant is applied, inspect the joints carefully to ensure that there are no gaps or areas where the sealant is missing. Smooth the sealant with a putty knife or a similar tool to create a neat and professional finish.
Quality Assurance
- Inspecting the Installation: After completing the installation and sealing, conduct a final inspection of the roof. Check for any loose panels, uneven surfaces, or improperly sealed joints. Look for any signs of damage to the plywood panels, such as cracks or splintering.
- Testing for Water Leakage: If possible, perform a water test to check for any potential leaks. Use a hose to spray water evenly over the roof surface for a period of time and observe if there are any signs of water penetration inside the building.
Contact for Purchase and Consultation
If you are interested in our water - resistant structural plywood roof panels for your curved roof projects, or if you have any questions about the installation process, please feel free to contact us. Our team of experts is ready to provide you with detailed information and support to ensure the success of your project. Whether you need advice on material selection, sizing, or installation techniques, we are here to help. Reach out to us for a consultation and let's discuss how our products can meet your specific needs.


References
- "Roofing Construction and Estimating" by J. E. Granberry
- "Plywood Handbook" by the American Plywood Association